LinkedIn for Bloggers – How to Create a Killer Profile
LinkedIn for Bloggers – How to Create a Killer Profile
It doesn’t matter if you are a full-time or part-time blogger, it’s critically important to have a LinkedIn profile. As the industry continues to mature, blogging (and being an influencer) has become a recognized profession.
By having a presence on LinkedIn, you are treating your blog and your brand as a business. And you will have greater visibility and more opportunities. I’ve worked in social media professionally for close to a decade. I’ve trained over 1200 employees at companies that I have worked to effectively use LinkedIn.
Some posts on this site contain affiliate links, meaning if you book or buy something through one of these links, I may earn a small commission (at no extra cost to you!). Opinions are always my own and I’ll never promote something I don’t use or believe in. Also as an Amazon Associate I earn from qualifying purchases.
I recently realized that there are quite a few bloggers out there who are either not on the platform at all or haven’t optimized their profile and my mission is to educate as many bloggers as I can on what they are missing out on!
Before I get into the tips and tricks for setting up a proper LinkedIn presence, I wanted to share some reasons why you should have a profile in the first place.
The Top 5 Reasons for Having a LinkedIn Profile
Visibility
Sure recruiters and employers are on LinkedIn, but do you know who else is? Brands. Specifically the PR folks from those brands and/or their agencies. They are always looking for bloggers to work with. The people hiring bloggers are on LinkedIn. You should be too.
Trust
There is a legitimacy that comes from having a LinkedIn profile. It’s validation that you are on the top of your game and know how to act professionally.
Google Loves LinkedIn
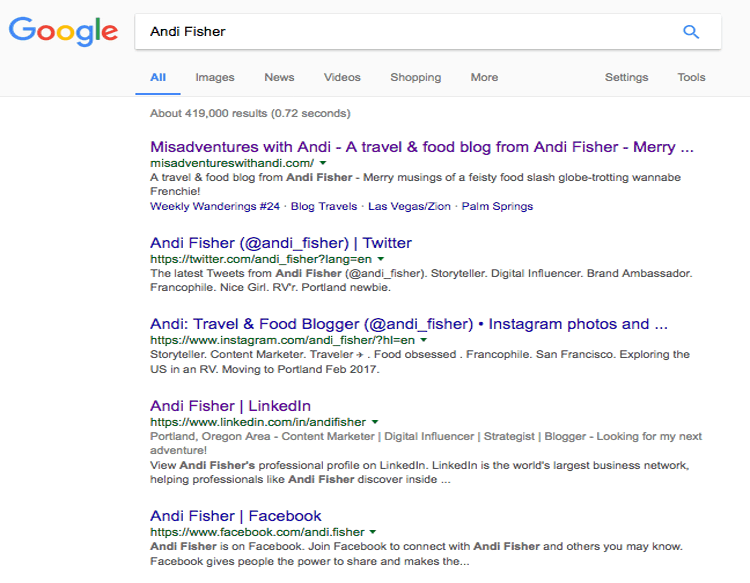
If someone Googles your name and you have a LinkedIn profile, it is generally going to show up in the first 5 search results. (That’s really great for pushing down results that you may not necessarily want others to see!)
Also, it feeds into that trust thing, having a LinkedIn search result makes you more credible.
Expertise
Having a LinkedIn profile that communicates the work you do shows your expertise. It demonstrates your proficiency and subject matter savviness. When we get to advanced techniques, I’ll share how you can show your prowess even more. All this is part of building your personal brand.
Networking
Holy heck are bloggers good at networking! Social media is in the blood and LinkedIn is just another social media platform. (Although there are some characteristics of the platform that you will want to be wary of, and I’ll explain them.) Take those same mingling skills and build a network of people to tap into.
What to do Before you Start Editing your LinkedIn Profile
Now that I’ve shared a few reasons why you should have a LinkedIn profile, I’m going to tell you how to create a killer profile page. The first thing you should be aware of BEFORE making any profile edits is that you should turn off Broadcasting. You don’t want to fool around with your profile with your Broadcasting turned on.
Otherwise, your network will be spammed with messages like: “Andi Fisher changed her headline.” “Andi Fisher updated her employment.” “Andi Fisher uploaded a photo.” “Andi Fisher no longer has a network because everyone got tired of her broadcast spam.” Right?!
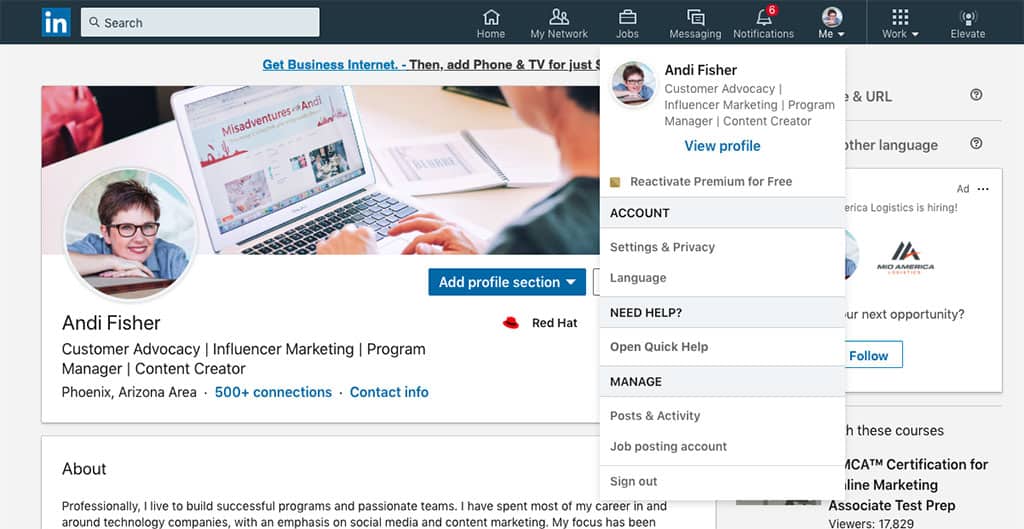
To turn off broadcasting, please do the following:
- In the top navigation bar, click on the “Me.” A drop-down menu will appear.
- Under “ACCOUNT”, click on “Settings & Privacy.”
- Once you get to that page, click on “Visibility” 3rd down in the menu on the left.
- Find “Visibility of your LinkedIn activity”
- Click on the arrow next to “Share profile updates with your network”
- Make sure it is set to “Off” while you are making updates.
Once you are done editing your profile, consider changing this privacy setting back to “On”. That way, when you have a new update or milestone, your network will be notified about it!
Create a Killer LinkedIn Profile
Main Intro Box
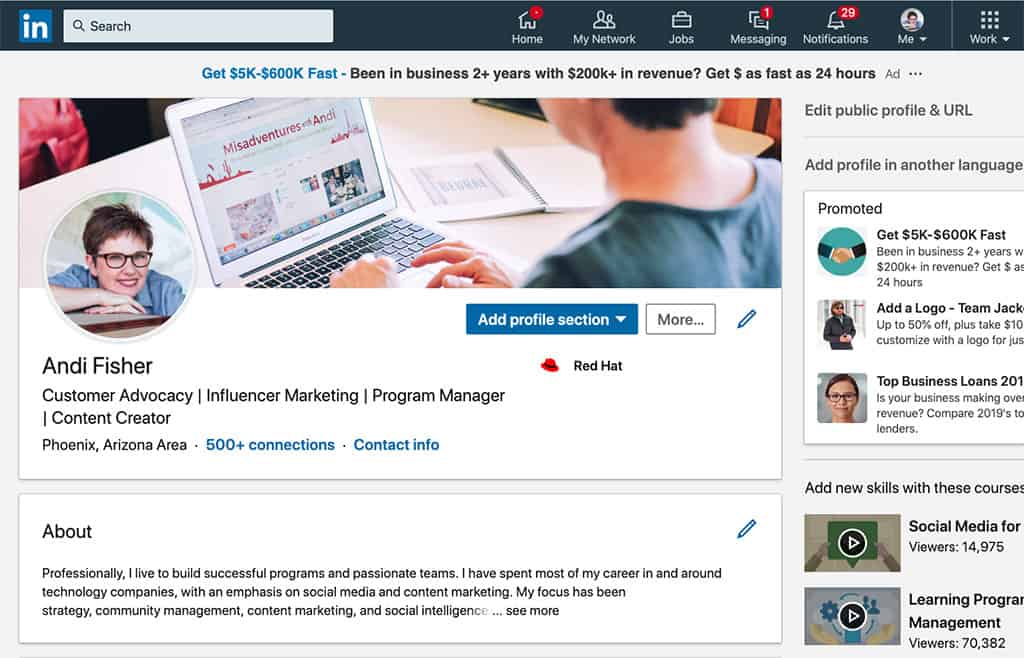
The first thing we are going to focus on is the most important part of your profile page, the intro box. It contains your image, your headline, a background image, and your contact information.
Your Image
Upload a good picture of yourself, maybe something that you use on other social media networks. It should be somewhat professional, meaning not a shot from a wedding or group night out that you got dressed up for, but rather a nice sharp headshot.
You can take one with your cell phone. Try to find natural light, simple background, and make sure you smile.
Your Headline
By default, LinkedIn will populate the headline with the title from your most recent job. People who leave the default title are missing out on search exposure. Your headline is what shows up in LinkedIn search results. Using keywords in your headline will communicate so much more than a title.
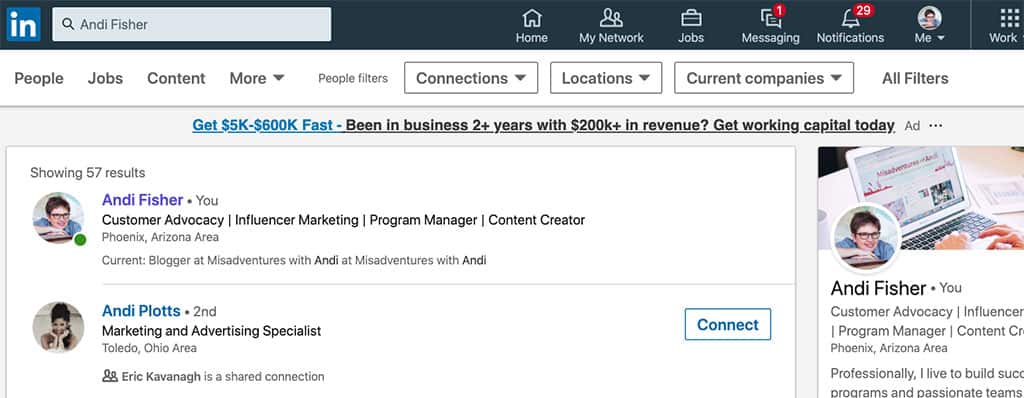
Do some brainstorming as well as searches on LinkedIn to find keywords that describe you. Here is mine: Customer Advocacy | Influencer Marketing | Program Manager | Content Creator. I change them often depending on what I think other people might be searching for.
Background Image
Just like Twitter and Facebook, LinkedIn allows you to customize your header or background image. This is your opportunity to include your branding or something about your blog. In my header, I have a photo of me working on my laptop on my blog.
I created the image for free in Canva and uploaded into to LinkedIn. If I had magical PhotoShop skills I would update the photo of my blog on the laptop screen because the design of my blog has changed, but not enough that I don't like the photo!
A couple of things to note: it should be simple, if it is too busy it will distract the visitor from the important information on the page and most of the image will be blocked by your actual profile.
So if you have something important that you really want to communicate, you need to ensure it is in the space either to the right or left of the background image. Adding a background image isn’t totally necessary; the default image from LinkedIn is a nice blue. It’s just a nice-to-have.
Contact Information
The intro box is also where you add the information on how people can best get ahold of you. You can add your Twitter handle, email address, and blog URL (If you have multiple sites or another online presence like an About.me page, then take a moment to add them.).
This is a great opportunity to put your blog information in front of a PR person or interested party before they've even requested any additional information like a media kit. Remember, make contacting you easy and convenient.
About
This is your elevator pitch. Your 30-second window to tell people at a high level why they should be interested in you. If you can do that in 2-3 sentences, great – that’s what people will first see when they land on your profile. If you have more to say, that’s good too, but try to capture their attention in the first couple of sentences.
Experience Box
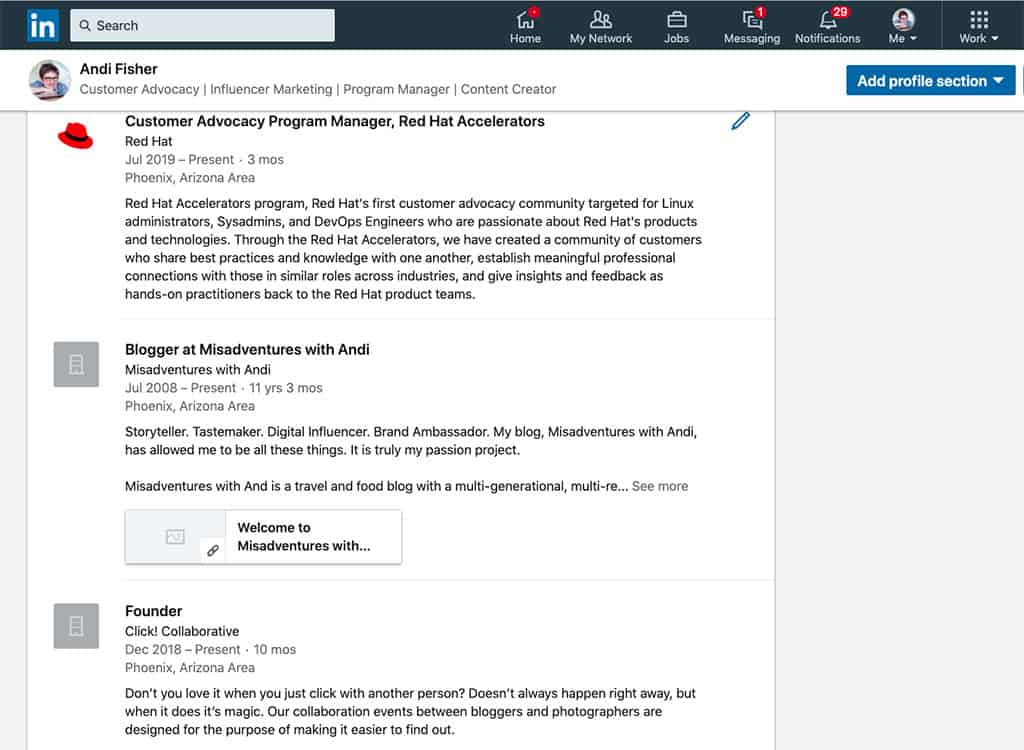
Now onto your professional experience, listed in the Experience Box. If you have a full-time job that is not blogging you are likely to already have listings here. If you don’t, add them! This is the area where you should add your blog.
Add a new entry and include your title (Blogger or whatever title you use), your blog name, a brief description of your blog, and how long it’s been in existence. If you have a media kit or link to a portfolio, add it here as well.
There is a lot of additional information that you can add to your LinkedIn profile (education, clubs, certifications, etc.) and you should populate your profile as completely as possible, but the sections that I have described above are the absolute minimum.
How to Create Your Custom LinkedIn URL
When you create a LinkedIn profile, you’re assigned a profile number that shows up in your profile URL. It isn’t pretty. To fix it, from your Profile page, look on the right-hand side for a link that says “Edit public profile & URL.” Once you are on the Public Profile page, look to the far right where it says “Edit your custom URL.”
If your name is common you may have to play around with adding your middle initial or dashes, but you should get to something that looks a lot cleaner than https://www.linkedin.com/in/name-name-59433312b/. Do not put your blog name, you need to be a person on LinkedIn.
Making Connections
Viola! You should feel really good about having a solid LinkedIn profile. But there are a couple of more things you can do to make it really killer. These are a little more advanced, but not difficult to do. Before I give you the final three things you can do to put your profile over the top, I want to say one word about connecting.
If a PR person reaches out to you to work on a project via your blog, another social media channel, or email and you end up working with them, you should connect with them on LinkedIn. You will start building an incredible network of PR people who have personal experience with you.
Other PR professionals will see that you are connected with their peers and colleagues and it is a great bump for you if someone is considering working with you even though they have no experience with you. They see that you are connected with others in the industry and you look like a pro!
3 Advanced Techniques for Increasing Your Visibility and Credibility
All 3 of these techniques will create social proof and make your profile stand out.
1. Endorsements
Endorsements are a list of skills you master that people have endorsed you for. People can suggest a skill and give you an endorsement for that skill, or you can add a skill yourself and people can endorse you for it. It’s basically a +1 or a Like in agreement that you master that discipline.
The list allows potential employers, recruiters, and PR professionals to see what your expertise areas with the added value that other people have agreed as well.
2. Testimonials
These take more effort on the part of people. Testimonials are written statements about how great you are. If you work with a brand on a project and it is an overwhelming success, consider reaching out to the brand once the project is over and asking for a testimonial.
If you work as a VA, ask a few of your clients to offer a testimonial on your work. Same if you do graphical design for bloggers, etc.
3. Newsfeed
Share content that you curate or write to your newsfeed. Part status updates part social media post when you share content you are top of mind. Word of caution: this is a professional network, so you should really only share content in that realm. Blogging how-to’s, networking tips, small business experiences, and other publishers’ content about these topics are all good things to share.
With these three techniques, plus a killer profile, you will go a LONG way to creating a professional, branded LinkedIn presence that will help you to connect with others. It will bring you greater visibility for influencer projects and freelance work and you will build a working network of individuals who can give you a leg up when needed.
You can see all these things in my own LinkedIn profile, I welcome you to check it out and connect! I also help bloggers out with their own LinkedIn profiles.
How about you? Any LinkedIn questions I can answer for you?
Like it? PIN it!
 |  |  |


Very helpful networking trick!
Thanks for the tips you have provided here. I have a Linked In account but, to be honest, I don’t feel I’m yet using it effectively.
This is very useful for me. Thank you so much!
Thank you for sharing these excellent tips! This article was extremely helpful.
Thanks for all the details! I definitely need to set some time aside and go over my LinkedIn. I’ve been trying to decide what to improve on and this helps!
I don’t see where to turn off the Broadcast Edits. Could there be a different name for it now? Or is it because I have the free version of Linked In?
@Annick, there have been some changes to the menu – thanks, I will update the post (again!) and it is a bit tricky/buried. From your photo in the top nav: Settings > How others see your LinkedIn activity in the left nav> Share job changes, education changes, and work anniversaries from profile > (Do you want your network to be notified of your work anniversaries and changes to your profile?) > Select No
Great article! A lot of useful tips that I’m going to implement from now on!
Fantastic tips for someone just starting out on their blogging adventure! Thank you 🙂
Great article/ Thank you for your help! I am just getting started with my blog. Looking for all the help I can get.
Hello there! Thank you so much for teaching us how to use LI to promote our work as a blogger.
Great post! I must say I do get a lot of my clients from LinkedIn, I don’t utilize it as much as I should. I’m bookmarking this to come back and try some of your tip recommendations.
I am glad that I bump into this article and I get a lot of helpful tips on how to make a killer profile from LinkedIn.
I’ve always wondered if LinkedIn would be a good networking opportunity as a blogger but could never figure out how best to utilize it. Great article!
These were really great tips for putting a bit more of a punch into our LinkedIn profiles!
What a really great and very helpful tips you have here! Thanks for sharing this with us!
I’m going to update my Linkedin profile soon. Thank you for these tips!
I haven’t really fully maximized Linkedin so, this post is greatly appreciated. I just have a profile but it badly needs updating. Thank you for sharing the tips. Will keep in mind to turn off broadcasting before I start working on it.
Also, I agree with you that having a LinkedIn profile helps establish credibility.
Linkedin is not my field, but you helped me to understand how it works and how to do a good profile!
My LinkedIn profile needs to be reviewed. I should definitely set some time aside for it. Thank you so much for the tips and guides